How to View HTML Code in Mailchimp
If you click to purchase a product or service based on our independent recommendations and impartial reviews, we may receive a commission. Learn more
With a 60% market share, 13 million users, and around 340 billion emails sent every day, Mailchimp means business. (Monkey business, that is.) Brands around the world rely on it for creating slick, professional-looking emails – then sending them en masse.
But while we love Mailchimp’s drag-and-drop email marketing editor, sometimes you need that extra dash of creative control. The good news? You can view, edit, and download HTML code – all from within Mailchimp.
The bad news? It can also be a little tricky to do, and there are a couple of banana skins along the way. But stress not – we’ve put together a step-by-step guide to walk you through the ins and outs of the process.
Read on to learn how to view HTML code in Mailchimp.
What is HTML Code?
HTML (HyperText Markup Language) is a coding language. Essentially, it forms the basic building blocks of a website: informing a page’s content and structure.
If you’ve ever stumbled upon what looks, at first glance, like a bunch of arbitrary arrows, letters, and numbers, you’ve come across HTML. It looks like this:
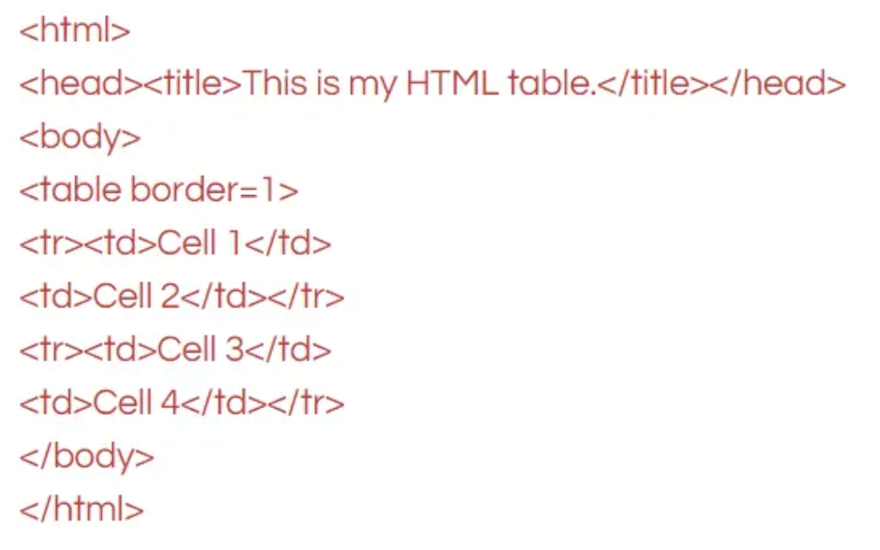
As you can see, raw HTML code isn’t pretty. But it underpins pretty much everything on the web – so it’s important!
For Mailchimp, of course, you don’t need to know HTML. (And, thanks to a whole host of website builders, a grasp of it isn’t required to create a website, either). But knowing HTML – and being able to create, insert, and edit it within your email templates and campaigns – offers more technical flexibility than Mailchimp’s drag-and-drop creator provides.
How to View HTML Code in Mailchimp
Ready to get started? Our step-by-step guide to how to view HTML code in Mailchimp (with screenshots!) will help you edit, embed, and download HTML code – ensuring your next campaign goes the extra mile.
#1. Edit Template HTML Code
To get started, head to “Campaigns” (in the sidebar to the left), then “Email Templates”.

From the template list that appears, simply select the one you’re keen to edit, and hit “Edit”.

As a reminder, you’ll only be able to edit the HTML here if you’ve already coded this template with Mailchimp’s template language. Or if you’re working with an HTML file that you imported yourself to create the template from scratch.
If you have, there’ll be an “Edit Code” button. Hit this to start editing your Mailchimp template’s code. Once you’re done dabbling, simply hit “Save” to hang on to your progress.
#2. Embed Code into Mailchimp
Next up? Embedding your code into Mailchimp. To do this, stay in the “Templates” section and select the “Create Template” option in the top-right corner.
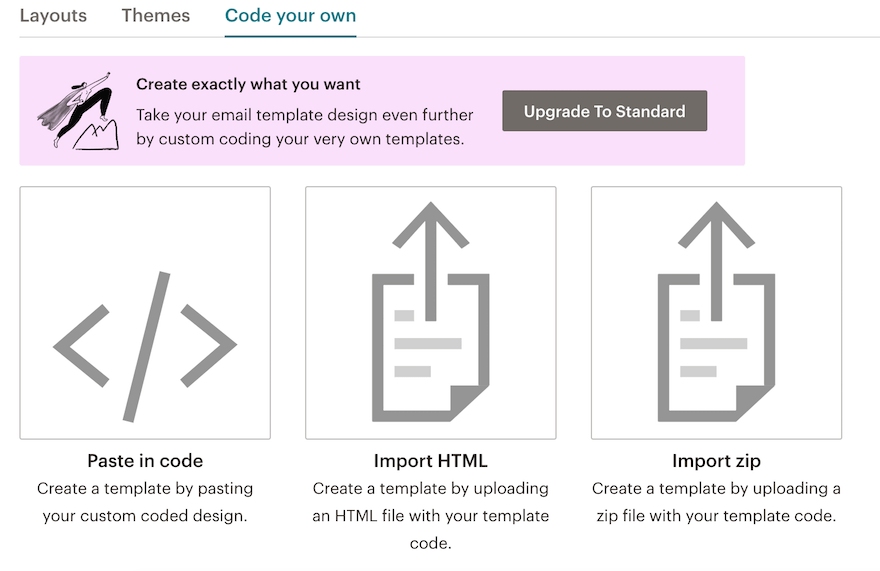
Here, you’ll get the option to “Code your own” email template – providing you’re on at least Mailchimp’s Standard package. (If you’re on the free plan, you won’t be able to.) Select “Paste in code” to add your own HTML with a straightforward Ctrl + V.
Then, simply paste your code into the editor, et voila – you’re done!
3. Create a Campaign with HTML Code
Now, it’s time to create a campaign with your HTML code – and start putting your hard work into action.
To do this, select “Design Email” from the campaign builder’s content section.

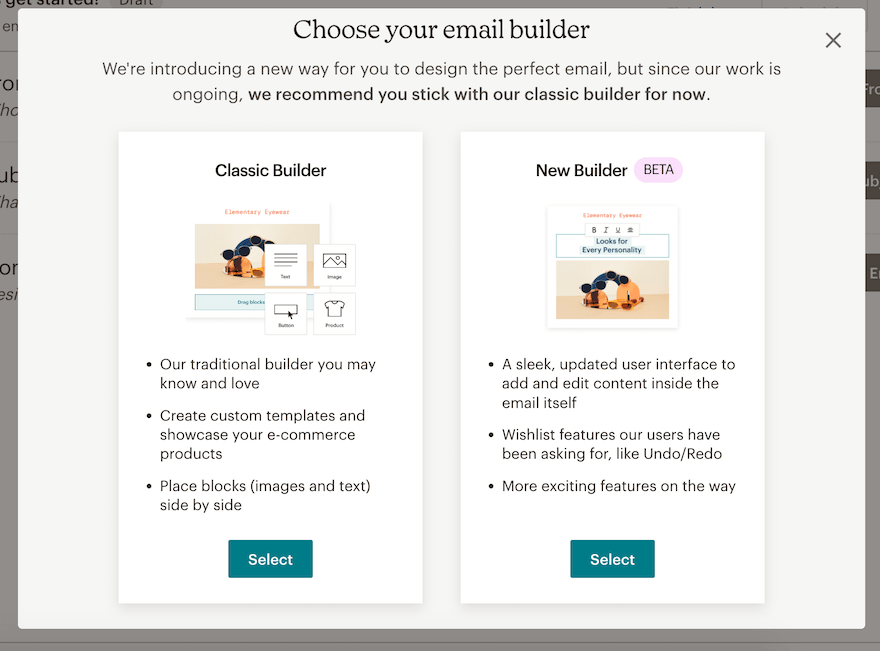
You’ll then get the option to choose between the “Classic Builder” and the “New Builder” (currently in beta mode). Pick one, but this won’t matter too much to you – you’re going to be building your own campaign with HTML code anyway, rather than within the limitations of the builder!
Then, select “Code your own” to get started. You can paste in your code (as per the previous step), or import it from a URL. Alternatively, you can upload a zip file with your template code, and create a campaign that way.
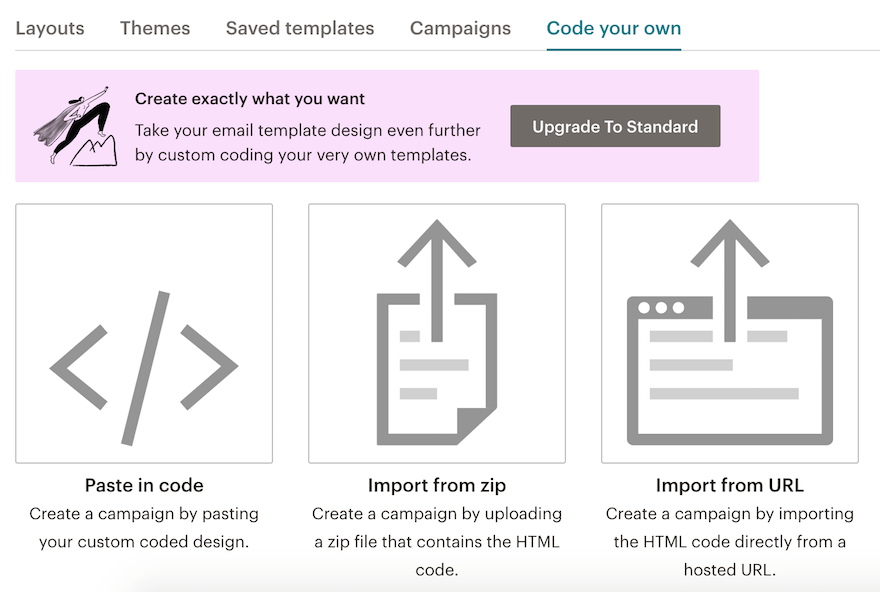
As a reminder, you’ll need to be on at least Mailchimp’s Standard plan ($17 per month) to be able to do all of this. Otherwise, you’ll get a notification like the above!
#4. Edit HTML Code
Whether you’re importing existing code or writing from scratch within the builder, add your code directly into your template or campaign for full customization over your efforts.
Mailchimp’s Content Studio comes in handy here – a tool that keeps your files to hand while you’re coding. It allows you to conveniently copy the source URL of files, and easily paste them into your custom-made campaign or template.
To do this, head to “Campaigns”, then “Email templates”, and select the template you want to work with. Navigate to “Edit code” and, from within this pane, hit “Content Studio”.
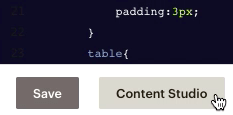
Then, select the file you’d like to link to in your code.
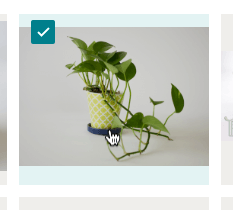
Following that, it’s as simple as expanding the drop-down menu alongside “View Details”, and selecting “Copy URL”. An alert will pop up to let you know your clipboard’s got the message.
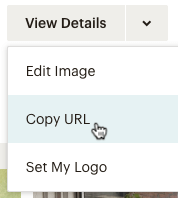
Finally, return to the “Edit Code” section and paste the URL into your code. Continue to edit the HTML as required.
#5. Download HTML Code
Now you’ve taken the time and effort to get your Mailchimp template right, you’ll want to hold on to it. To save it, and reuse it – time and again.
Fortunately, Mailchimp makes it easy to download (i.e. export) your saved templates as HTML files. Simply navigate to your chosen template, and select “Export as HTML” from the drop-down list next to the “Edit” button.

We only recommend exporting as HTML emails you’ve built (or imported) as code, rather than with Mailchimp’s content builder. If you export templates created with drag-and-drop, this functionality won’t be included when you import that code back into a Mailchimp template later.
How to View HTML Code in Mailchimp Summary
Editing your HTML code in Mailchimp can be tricky at first, but you’ll get your head around it with time.
Plus, it’s worth remembering that viewing and tinkering with your HTML in Mailchimp isn’t mandatory – you can still create and send beautiful emails without touching any code. But, for those seeking that extra bit of technical control and flexibility, being able to reuse code from your website in your emails is a skill you’ll want to get the hang of.
Now what? Well, why not check out one of our many other articles related to email marketing? We suggest starting with our guide to the best email marketing examples – creative and compelling, they’re ideal inspo. And the perfect place to start!
Leave a comment